PaintWizz makes it easy for multiple team members to collaborate, perfect for businesses that need to generate quotes quickly and efficiently.
The Account Structure
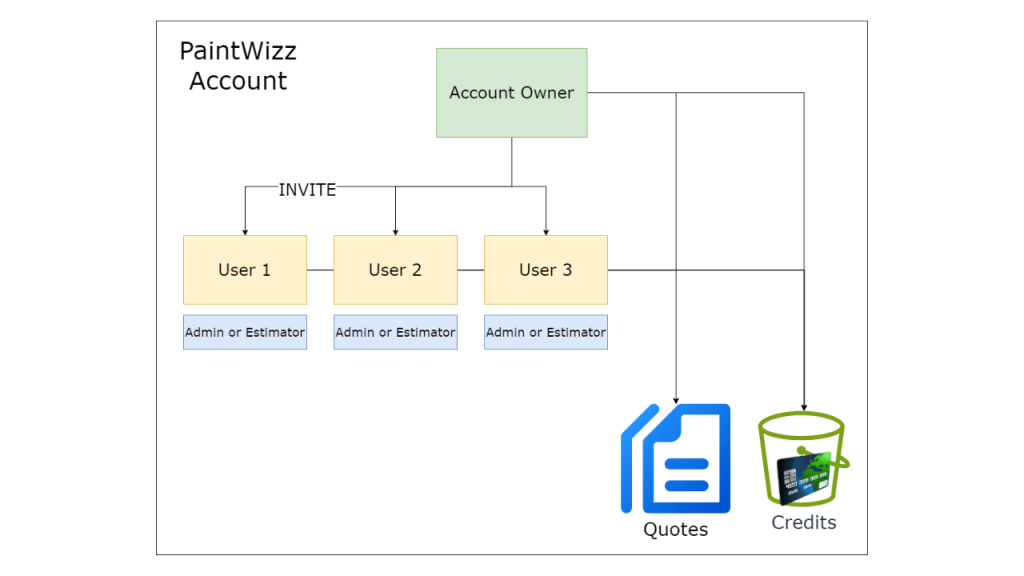
A user can use PaintWizz in one of 3 roles. An account owner, an Administrative user or an Estimator. All users of the account can create quotes, and view quotes created by other team members. Credits on the account is shared between all users. Each time a new quote is created by any of the account users, including the owner, a credit is deducted from the account balance.
The Account Owner
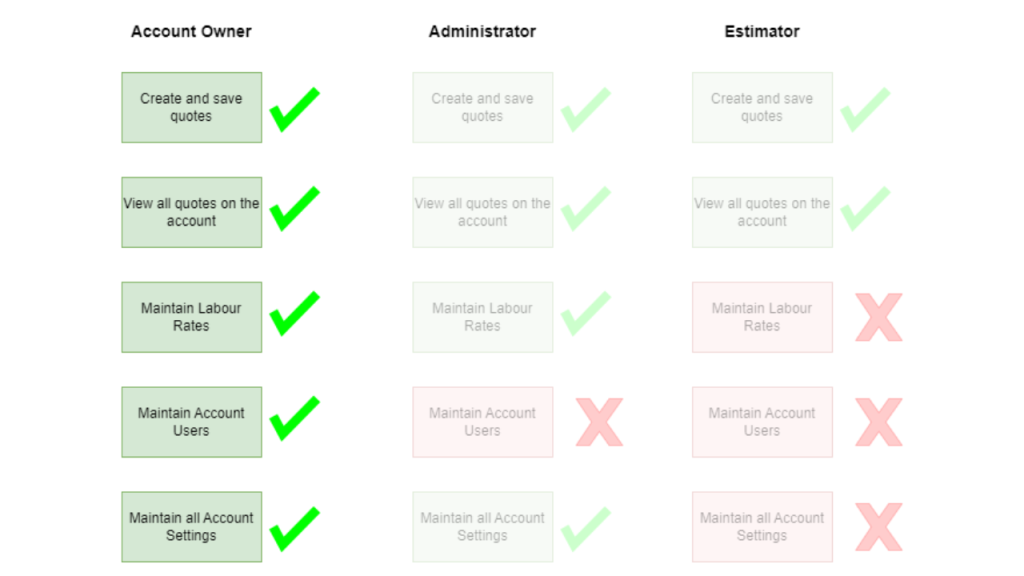
The person who signs up and creates the account is called the Account Owner. As the owner, you can invite others to join and assign them specific roles—either as Administrators or Estimators. The account owner has full authority to perform any action on the PaintWizz account, can see, view, and edit all quotes on the account, and can add or remove users of the account at any time.
The Administrator Role
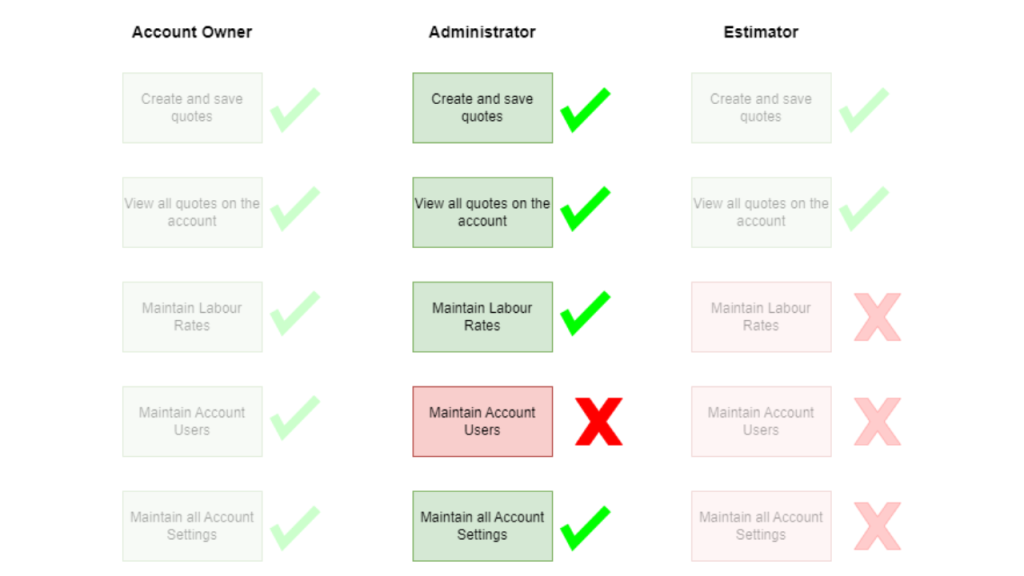
You can think of an administrator as an additional user who has access to the same features of the account owner, except that an admin user is not able to add additional users to the account. An administrator can only edit their own quotes but can view all the quotes created by other users of the account.
The Estimator Role
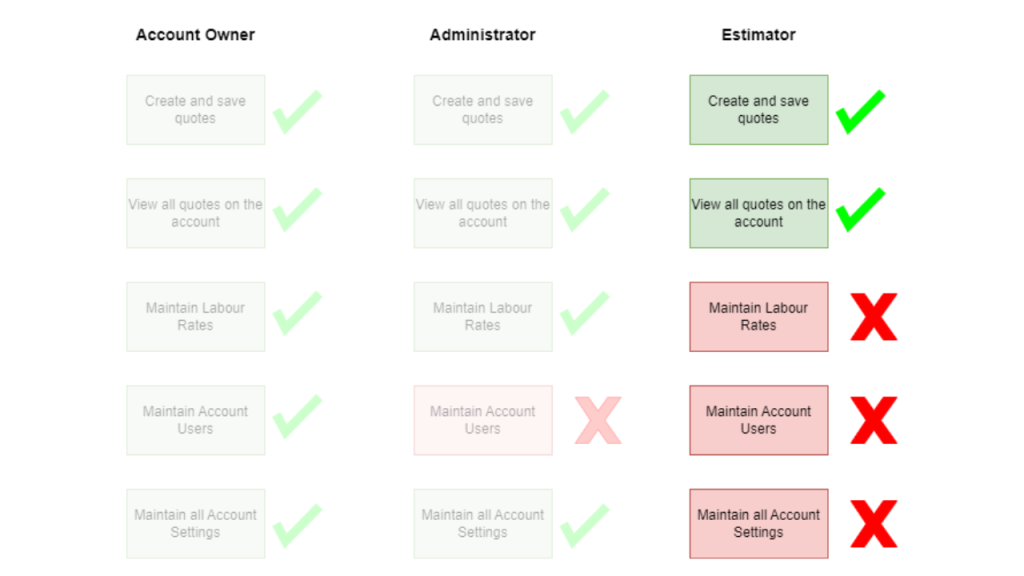
An estimator can create quotes, save quotes and view all saved quotes in the account, but
does not have account management permissions such as purchasing credits and setting up labour rates.
How to invite someone to use your PaintWizz account.
- To add additional users to a PaintWizz account, sign into PaintWizz using the email address supplied when creating the account.
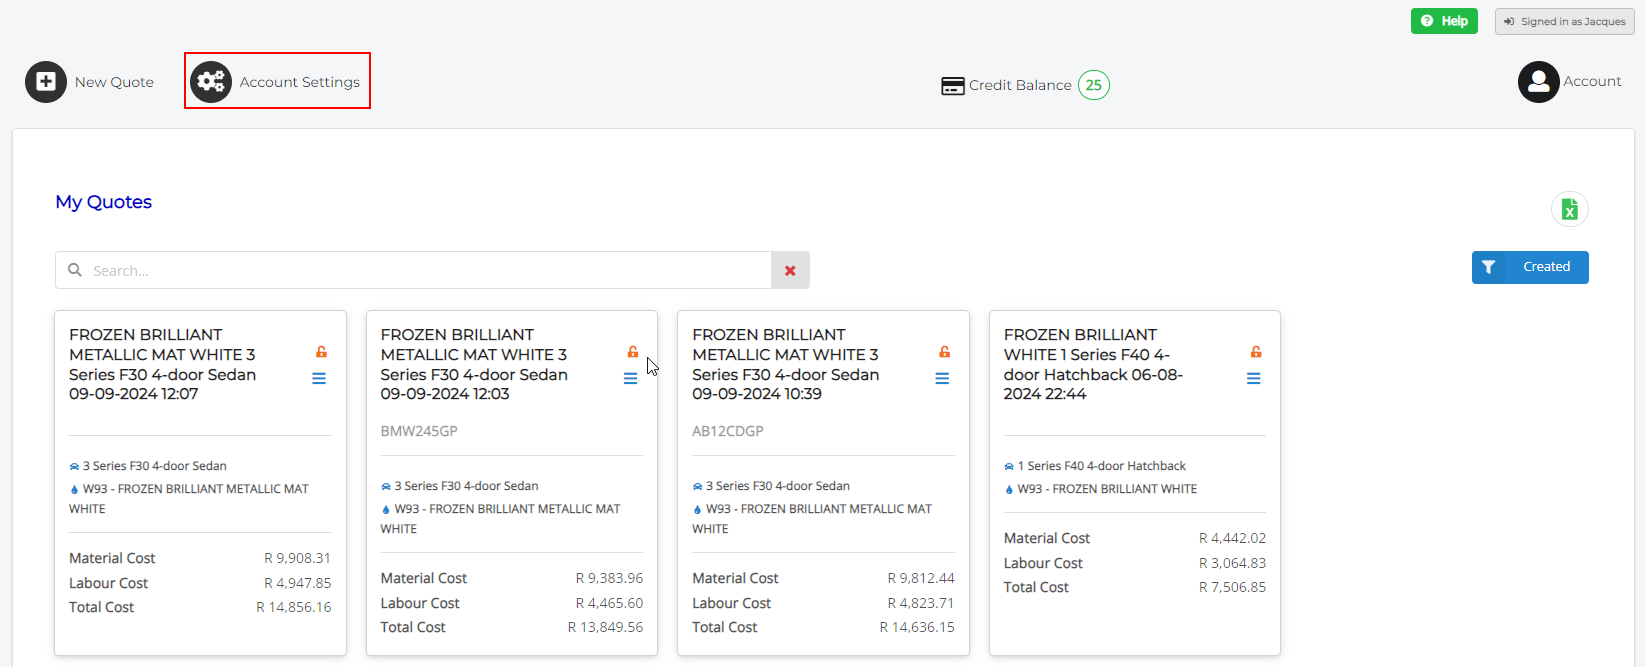
- On the Dashboard, select “Account Settings”
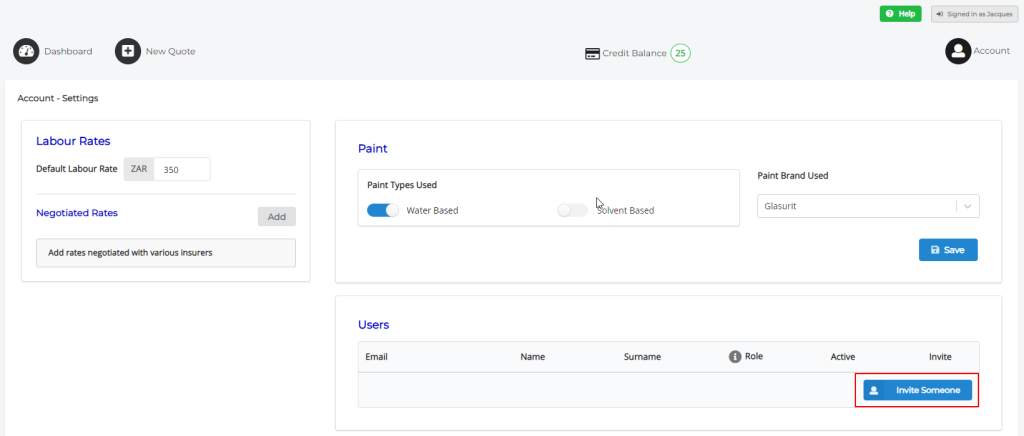
- In the users section, click “Invite Someone“.
- Enter the correct email address of the new user, select the correct role, and click “Send Invite”. Repeat this step for each additional user you want to invite.

- Click “Done”. You will now see the email address and role of the person in the Users Section, with the invite column set to “Sent”

- The system will send an email to the invitee, with a unique link to accept the invite. The link is only valid for a limited period and the invitee must accept the request within 48 hours by clicking on the link. If the email is not received, you may resend an invite by clicking on the “Resend Invite” button.

As soon as the invitee accepts the invite, and completes the sign-up process, the invite column for the user in the users table will change to “Accepted”. Note that you may have to refresh your browser to see the updated status.
The invitee can now continue the signup process.

